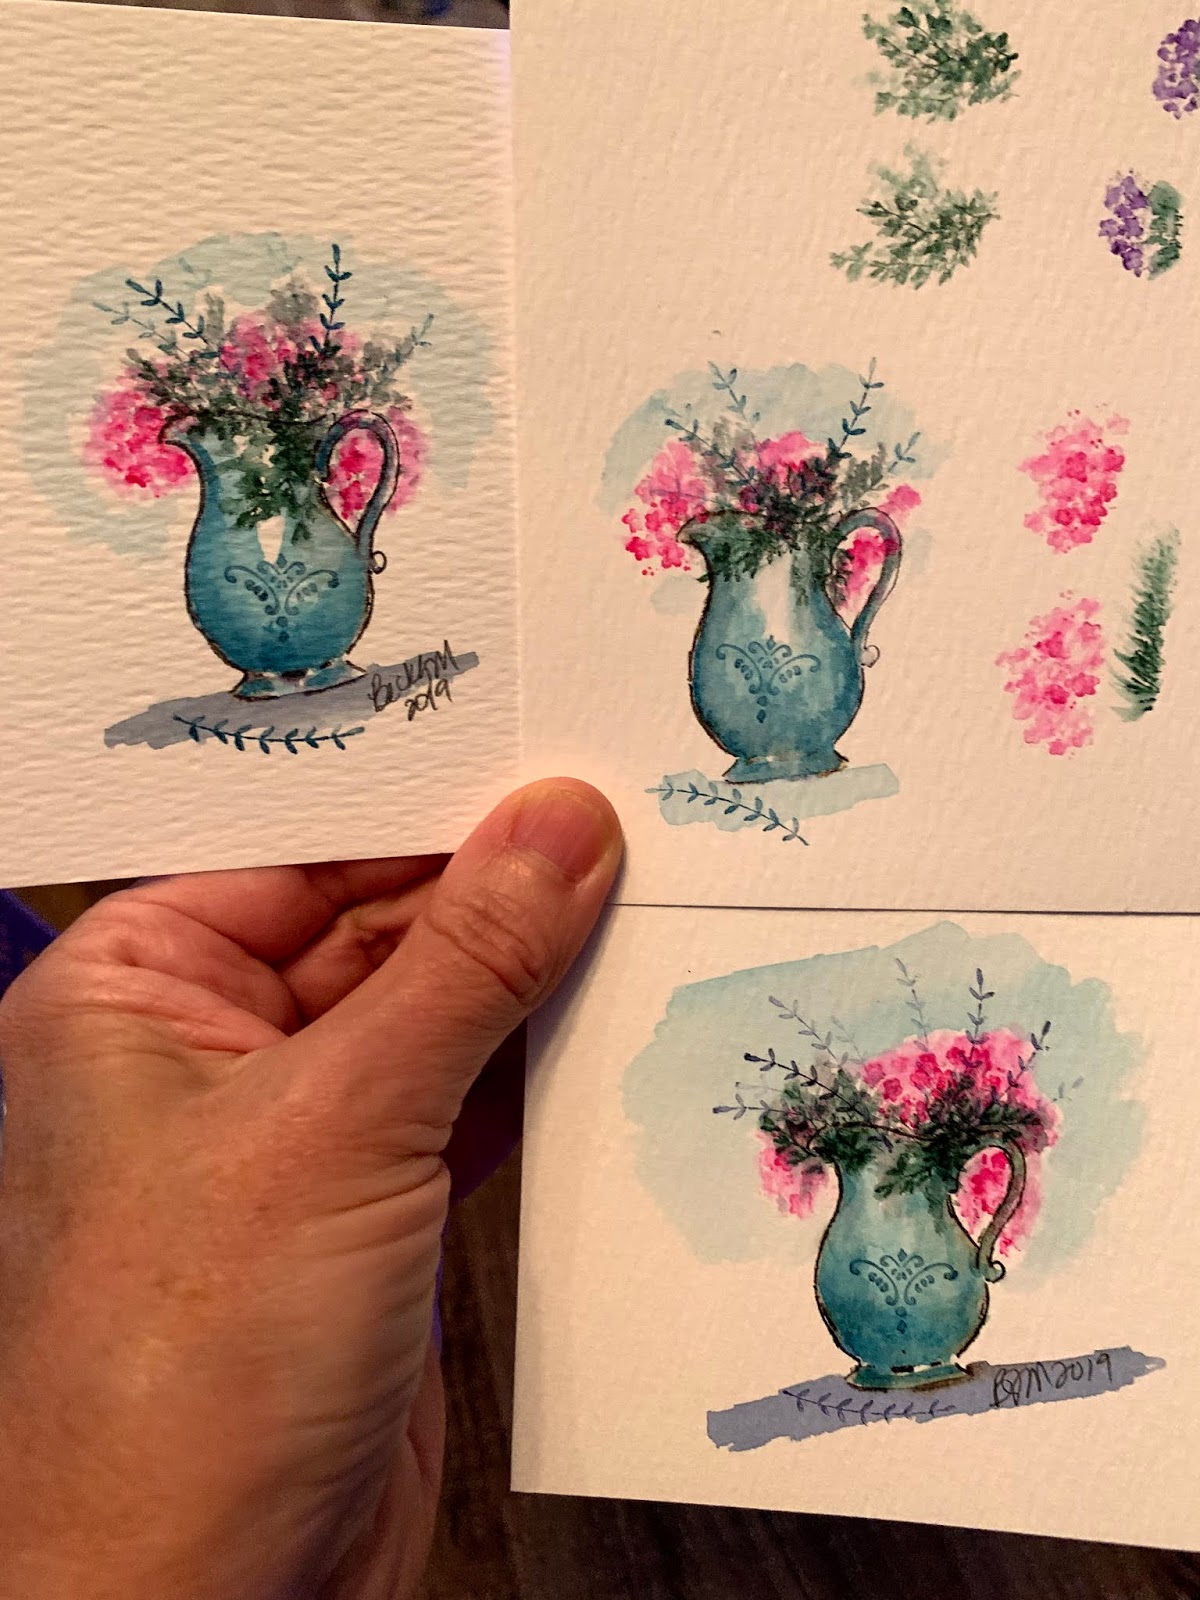
Thursday, December 5, 2019

Flourish Cover Die to the rescue!


It's that time again!  Yep.  It's December and time to send out those Christmas cards. Are they ready to go? 

Heh. Nope. 

So I decided to try using this cover die from Brutus Monroe called "Flourish", to see how quick and easy it would be to put together some cards.  I've included links to the products that I used within the blog text.  (Affiliate links are used when possible)
Why haven't I tried this earlier?  This is a beautiful die. I used a metal shim to help cut the intricate pattern and it cut perfectly.  
I used my Scor-Buddy to score the fold for this A2 card. 


 This fine tip glue bottle from Karen Burniston with Lineco glue works so well.  It was perfect for this intricate design. 


I decided to emboss the Merry Christmas sentiment with Wow! Totally Teal Embossing glitter. An Embossing Buddy, Versamark ink and my Misti stamping tool made it easy.  


My Tonic Studios paper trimmer cut it down to size.


Last was the sentiment for inside the card.  Luckily I had some Hero Arts ink that was a perfect match to the background mirror paper I used. I don't recall where I got the mirror card stock which makes me really mad at myself because I'd love to get some more of this color. The pictures do NOT do it justice.  

The sentiment stamps are from a 2015 Karen Burniston release called Merry and Bright which is no longer available. I'd bet that if you would search through your stamp stash, you'd find something that works for your card. 

I hope this has inspired you to give cover dies a try.  Happy card making!!  Becky


Saturday, November 30, 2019

Holiday Tags with Copics

I just love the way these tags turned out!!  The stamps we used were by Stampendous and the tags were made using dies from  La-La Land Crafts. 

We did some fun Copic techniques in class, assembled the tags, and then added some Nuvo Glitter Drops for some extra sparkle.  

Next month at Scrapp'n Savvy we will be having fun with Art Impressions watercolors. If you'd like to join us on December 14th, please contact the shop to reserve a seat. 


I hope everyone had a safe and happy Thanksgiving.  

Take care, Becky xoxo

I have used affiliate links when possible. xoxo

Wednesday, November 27, 2019

Thanksgiving week sales!

Hello Friends, 

Need a break from the cooking/baking and parade watching? 

Why not take a few minutes and shop from some of your favorite paper crafting companies. I've put together a list of some of mine, and all are having specials this week. I have used affiliate links when possible. 

I must begin with a local shop, Scrapp'n Savvy. I plan to visit on November 30, Small Business Saturday, between the hours of 10am-1pm.  Karrie will have make-n-takes featuring Karen Burniston, of KB Riley.  Karen will also have her products including her newest release for sale that day. Come out and support your local businesses! :-) If you're not close enough to visit in person, I've included a link to her online store.  Karen Burniston KB.Riley. 

I love Tombow dual brush markers and use them for Art Impression watercoloring. I've been told that they are also great for hand lettering. They have a gift giving guide and a scholarship program that you might be interested in. Tombow Black Friday Sale  

Waffle Flower Black Friday Sale  Waffle Flower has a $25 grab bag for up to 75% savings!  Beautiful stamps and dies. 
Tonic USA Cyber Week Sales. The Tim Holtz Glass TRAVEL sized mat is now available.  Susans Garden is back with more beautiful flowers. Lots of Cyber Week sales!

Art ImpressionsLove love love Art Impressions!  Wanna come and play with their watercolors in December?  Contact Karrie for class times. 

Impression Obsession has 25% off of their store with Promo Code THANKS.  Excludes their clearance items which are already 50-80%off.


Picket Fence Studios What can I say about Picket Fence Studios except WOW!  Have you tried Nicole's Life Changing Brushes?  They are amazing!  And her stamps are absolutely beautiful. 20% off until December 2 with some exclusions. 


Have you tried the MISTI stamping tool? If you haven't, here's your chance to get one for 25% off! Click this link and go shopping!  My Sweet Petunia 


Altenew.  Beautiful stamps for coloring with markers, layering stamps, super sweet sentiments, and lots of beautiful Ink pads.  Their florals are amazing. Click this link to shop Altenew 


Ranger Ink is having a different sale every day this week.  Today is DAY5 at checkout. 


Follow this link to Honey Bee Stamps They're having a 25% off sale on Thursday and Friday. 
No coupon necessary. 

 My Favorite Things. Love the stamps and dies from My Favorite Things.  Use Code THANKS until December 2.

Cricut doesn't just make fabulous machines. My favorite paper trimmer is from Cricut.  :-)Cricut Maker

Hero Arts is offering free shipping over $25. and an enamel pen with any order while supplies last. They are always giving back to the community.  

I'd love to hear about your favorite products in the comments below.  

Happy Thanksgiving!  Becky xoxo


Friday, November 15, 2019

Watercolor with Art Impressions and Tombow!


Hello friends!  

I had some fun recently with Art Impressions Stamps and Tombow Dual Markers and would love to share the fun with you!  It's amazing how easy it is to create these beautiful watercolor projects. 

I'll be teaching the techniques in two separate classes on December 14th at Scrapp'n Savvy.  Everything you'll need is supplied, so no need to worry about what to bring. :-). Sign up for class is available via the website, or by calling the shop. 

If you'd like to check out the stamps and markers ahead of time, I've included affiliate links above to Art Impressions Stamps  and Tombow Markers. Ai also carries a line of stamps for Bible Journaling. 

Scrapp'n Savvy also has stamps and markers in stock. 

It's fun.  It's relaxing. I hope you give it a try.  

Take care, Becky

Morning Class

Afternoon Class


Saturday, October 26, 2019

Congrats to the Doc!

We have spent the last week moving our Dental office to a new building.  It's big and beautiful, and filled with lots of new equipment.  Monday is the first day seeing patients there so we are surprising the Doc with cake and a card to celebrate!  

I chose a Karen Burniston HousePivot Panel pop up design for the card. For the front I combined words from Karen's Word Set 1 Greetings  and Word Set 2 Birthday.  I die cut and glued together 5 layers of each word, dabbed them with Versamark Ink and then heat embossed them with Ranger Ultra Thick Embossing Powder. I used a Hero Arts, Wagner Heat Embossing Tool to heat the powder.  This heating tool gets REALLY HOT, so I recommend using tweezers or something similar to hold the paper to protect your fingers.  To finish the front, I added two borders from Karen's Border Blend Party set.  

Card Front


Close up showing thickness of letters.


Now to the inside!   If you're like me, assembly instructions are a necessity, and Karen has awesome videos on her website, KarenBurniston.com. 

My decorative paper panels were cut using Crosshatch Rectangles. I absolutely love her crosshatch dies. You can see the crosshatch design around the edges of the paper.  There are circles, squares, and ovals also. 

The HousePivot Panel is easy to fold and adhere into the card. Again, the video helps. I went ahead and glued the panel in before I decorated it. It wasn't hard at all to decorate afterward.  I cut decorative papers for the houses and used a White Gel Pen in the stenciling feature she put in the door dies to add door knobs and windows. The grassy edge is from the Natures Edges  die set.  The trees are part of the House Pivot Panel set, which is so nice!  

I used tape runner on the paper panels, but for the rest of the project I used Lineco Adhesive Glue in a 

Fine Tip Glue Bottle.  Karen carries the glue and bottles, but has added the 18 Gauge Bottle Tip, which is absolutely fantastic!  

The sentiment is from a set by Simon Says Stamps. I used my Mini MISTI Stamping Tool, which I can't stamp without(why would I), and Altenew Obsidian Ink. This black pigment ink leaves an incredibly clean image. I cut fishtails on the sentiment banner and used  dimensional adhesive to pop it up.  

I added a few enamel dots from Gina Marie Designs on the card front and on the inside.  I cut another Crosshatch Rectangle in off white for the back of the card, so we would have a place to write a few words. 


I've listed some other supplies that I used below.
  
EK Success Scissors.  
ScorePal 12x12 Scoring Tool 
Big Shot Die Cutting Machine
Tonic Tim Holtz Trimmer
Cricut Portable Trimmer

I always encourage my paper crafting friends to support local shops, so if you are in the area and can visit Scrapp'n Savvy you'll find Karen'right nows dies there. 
If you can't find her products locally, I've used affiliate links whenever possible.  

I need to mention her collaboration with Pear Blossom Press!  They worked together to come up with some pretty amazing projects using Karen's card designs and Pear Blossom Press's lights.  Check out her blog, KarenBurniston.typepad.com to see all the fun stuff they've made! 

If you order from either Karen's website or Pear Blossom Press prior to Nov 2, 2019, and use the code POPANDLIGHT, you'll receive 15% off of your purchase.  
    
Quarterly Sampler at Scrapp'n Savvy is November 1-2, 2019. Its an opportunity to see and sign up for the upcoming class projects, meet the instructors, and shop with a 15% discount while you're there. The discount can not be used on the Silhouette Cameo or Copic Markers. There might be other exclusions that I don't know of. Contact the shop if you'd like to attend so Karrie can save a seat for you. 

Take care and happy shopping!
Becky


Thursday, October 17, 2019

Ghoul Friends have more fun!!!

Greetings Ghoul Friends!!

 This Art Impressions stamp set caught my eye and wow!!! What fun we had coloring it in classes at Scrapp'n Savvy! 

We colored the image with Copic Markers, then used 3 different Distress Oxide Inks with Picket Fences Life Changing Brushes to color the frame. 

There are so many accessory stamps in this set that I added them to the frame and heat embossed them with black detail powder. 

The frame is popped up on the image with the sentiment popped on top of the frame. I added a few purple sequins for some more shine. Wink of Stella, clear, added a bit of sparkle here and there. 

Thanks for stopping by!  Take care, Becky


Art Impressions Watercolor Class was a hit!!!

Our first Ai watercoloring classes at Scrapp'n Savvy were packed and so much fun! Who knew it could be so easy to watercolor such beautiful works of art? Using Bonnie's techniques and Tombow Markers, we had a blast learning how watercolor the Ai way. Our next watercolor classes will be in December at Scrapp'n Savvy.  Stay tuned for details! Click on the links to visit their websites. Take care, Becky 

Three different classes, three different looks. All Beautiful!
Tombow markers and masking tape.
Bikes and sheds
Ai class kit. 


Bike close up. 


Sunday, October 13, 2019

For Bloglovin

<a href="https://www.bloglovin.com/blog/14269617/?claim=5225m26g9es">Follow my blog with Bloglovin</a>


Saturday, October 12, 2019

Happy Birthday Scrapp'n Savvy!

February is birthday month for Scrapp'n Savvy!!

I decided to celebrate by teaching a window card using Birthday Cake Molli from La La land Crafts, and the Rock'n Rectangle card base by Karen Burniston Designs. 

I used a KB sentiment die to cut out several layers of Happy Birthday, glued them together and then used extra heavy embossing powder to make it POP! The acetate window works perfectly with this die set. 

Card inside with Rock'n Rectangle. 
Card closed from front.

Birthday Cake Molli.

Feb, March and April 2019 classes. 
x

The House Mouse stole my heart!


This stamp is so adorable.  The House Mouse Designs, Cross Stitched Heart with a card base by The Stamp Doctor made for a really fun January 2019 class at Scrapp'n Savvy. 

Not only did we stamp and color with Copic markers, but we also stitched using DMC floss.  We decorated the back of the card with a sentiment and left room for a personal message. 

Happy Valentines Day!!   

Sunday, December 9, 2018

Mermazing Cruise with Scrapp'n Savvy!

What do you get when you take forty crafty ladies and put them together on a cruise ship?? A ship load of fun!!!!  (and CRAZY fun shenanigans!!!)

We left on Sept 30 out of Galveston, on the Royal Caribbeans Liberty of the Seas.  I am NOT a seasoned cruiser, so I learned a lot on this trip.  My husband went with us and became our unofficial photographer. He put together a slideshow (complete with music), that he presented on our last day. 

We swam with sting rays, snorkeled and lounged on the beach. Our days at sea we spent in the crop room, which was available to our group 24 hrs a day. 

We had classes with Karen Burniston!! She is incredibly talented and we were so lucky to have her (and her trunk) show with us.  

Karrie Allen from Scrapp'n Savvy taught a super cute suitcase, cruise themed of course, that holds a scrapbook. She also had a store onboard!  You never know when you'll need a new tape runner!! 

I taught a Copic class with LaLaland Crafts Sassy Mermaid Molli and background clam shell. The project included a loaded envelope made with beautiful papers and embellishments.  

Michelle kept us all informed and produced a cruise project booklet that was fabulous, and helped run the store, and helped pack ALL THE STUFF, and made purchases for the cruise and......I'm sure I have NO IDEA everything she did. And guess what??? She's doing it again Feb 9, 2020!  

Karrie has scheduled another cruise in Feb 2020 to celebrate Scrapp'n Savvy's 10th anniversary, and sign up has started. 

We will have Karen with us, Karrie, Jane, and me.  Yay!! Come and join us! 

The crop room. 


Rob and I getting ready for some entertainment!

Me, Michelle(Karrie's right hand gal), Karrie, Karen


Whoa!!Playing catch up!

Oh my goodness I'm so far behind with my blogging.  The only thing I'm farther behind on is cleaning my craftroom, so you can imagine what it looks like.                                                          
                                                    * EEKS!! *

This photo is of the third quarters classes at Scrapp'n Savvy.

On the left is a beautiful Prima stamp from the Princess series named Maia. We colored the flowers as orchids, but they could easily be any color.  We finished it with a frame that we wood embossed and added some pretty pearls and ribbon.  

Center top is the Intro to Coloring by Copic workbook and class kit.  This was a full day of super fun coloring, techniques, and learning about our markers.  If you're interested in this class, I'll be teaching it again in January 2019.  

Center middle and bottom is from Stamping Bellas Snapshot series. We colored both stamps and assembled the cards in class.  The frame is so cute! It is just like the polaroids we took years ago. 

On the right is the Santoro Gorjuss Girl, Little leaf.  We colored her and layered the branch and beehive with dimensional adhesive.  The made the frame by using a die from Elizabeth Craft Design and some pretty printed cardstock. 

I've included links to the products where possible. All projects were colored with Copic Markers.  

One post down!!  Whoop whoop!! 

Until next time, take care, Becky


Thursday, June 21, 2018

Beautiful Dogwoods with Bluebirds

Greetings friends!

I just love this image by Fran, from Stampendous, called Dogwood Birds.  It reminds me so much of the mountains in Virginia!  Pink dogwoods are so beautiful, and many people have never seen one.  I was lucky enough to have one close to my home where I grew up...and bluebirds.  Just perfect.  

I colored this image with Copics, then added some colored pencil over top of the Copics for some added detail.  The background is a Tim Holtz stencil with distress ink.  

I searched the internet for images of birds and dogwoods to try and get as true a representation as I could.  I hope you love it as much as I do.

Until next time, take care,  Becky


Friday, January 12, 2018

Holiday Loaded Envelope swap!

I attended the La-La Land Palooza craft retreat last year and had a blast! I participated in a Loaded Envelope Swap, my first one, and had a great time putting it together.  

I used Christmas Bell Marci as my image for the envelope and colored her with Copic Markers. 

I made the envelope and decorated it with Christmas papers. I made the rosette and found a beautiful red flower with stones for the center. I filled the envelope with tags and goodies.  It was a LOT of fun to make.  xoxo

Birthday Cupcakes! (and a confession)

Ok, I have a confession to make.  I sometimes get so excited and in a hurry to download/print and color an image that I'm not too careful about making a note of where said image came from.  Since it's a digi, there's no packaging to refer back too. (heavy sigh).  This is one of those "said images", but I wanted to show her off, cause I think she's gorgeous!  

If you recognize her, please make mention below so that I can give credit where credit is due. I did an internet search for girl holding cupcakes and I had NO IDEA how many images there were.  Unfortunately, this one didn't pop up. 

Back to the beautiful girl...I colored her with Copic markers and added some shimmer here and there.  I used Nuvo drops on the background to add a little extra sparkle and she was ready to mail to a friend.  (Love you Pat!)  xoxo

Thinking of you Abella

I love this beautiful girl from Stamping Bella.  She is "thinking of you and all of our good times together".  The image and sentiment are perfect together.  There is also a die available for this stamp. 

I used Cryogen white, Curious Metallics paper for this image, so there is a faint shimmer all over. I colored her with Copic markers, added some pretty papers, and mailed her to a friend.  xoxo


Holiday Petals and Loaded Envelope

Ya I know, it's January, but I'm still catching up on my blog posts from 2017.  
I've been slackin!! 


"Holiday Petals" is another really cute digital image from Mariko Creations. I colored him with Copic markers and used him on a tag that I included on a loaded envelope that I made for a friend. He has such friendly eyes!  xoxo


Sweet little Unicorn from Mariko...


Hi everyone.  I have another digi today from Mariko Creations.  This sweet little unicorn is sitting pretty on a wreath of flowers.  She has wings, so of course I had to have her resting on a cloud. 

I colored her with Copic markers and added some sparkle here and there.  Some Nuvo drops and the sentiment finished it perfectly.    xoxo


"Thank You" from Mariko creations

I just love these flowers on this image.  It's clean and simple, but elegant at the same time.  I can see me using it over and over.....The image includes the heart with sentiment.

I colored the image with Copic markers. A hearts embossing folder was perfect for the background. I added some die cuts on the corners and this card was ready to go in the mail.  

Visit Mariko Creations on Etsy by clicking the link.  xoxo